
I set up my first home office in 2019 in a spare bedroom in Columbus, Ohio. By month three I had eleven cords running from desk to wall in every direction. I stacked them in a loose bundle with a binder clip. That lasted about a week before the whole mess started creeping back across the floor. If you have been staring at the same rat's nest under your desk and waiting for a weekend project to fix it, I can tell you right now: you do not need a weekend. You need about thirty minutes and one cable management box.
The problem most people run into is reaching for the wrong solution first. They buy velcro ties, bind six cords together, and create one big organized-looking bundle that still sits on the floor in plain view. Or they try to staple a cable channel to the wall and strip a screw in the drywall halfway through. This guide skips all of that. Every step here is reversible, renter-safe, and requires zero tools beyond a pair of scissors.
The box I use to hide my power strip in about twenty minutes
The D-Line Cable Management Box fits a standard six-outlet power strip, routes cords through side openings, and sits flat on the floor or on a desk shelf. 4.5 stars from 13,890 buyers.
Amazon Check Today's Price on Amazon →Step 1: Count Your Cords and Name Every One
Before you buy anything or move anything, get on the floor next to your desk and count exactly how many cords are back there. Write them down. I did this for my own setup and found fourteen: monitor power, second monitor power, laptop charger, phone charger, external hard drive, USB hub, desk lamp, speakerphone, printer, ethernet adapter, and four cables I genuinely could not identify until I traced them.
Identifying every cord before you organize them matters because it tells you whether you can safely unplug or eliminate anything. I found two chargers for devices I no longer own and one cord for a monitor I replaced eight months earlier. Removing those three cords instantly made the job simpler. Pull each cord taut, trace it from device to outlet, and label the outlet end with a piece of painter's tape if you are worried about forgetting.
This step also helps you size your cable management box correctly. If you have fewer than eight plugs going into one power strip, a standard medium-sized cable box will cover it. If you are running two power strips or a large surge protector, measure the length before you order so the box lid actually closes.

Step 2: Gather Your Cords Into One Power Strip
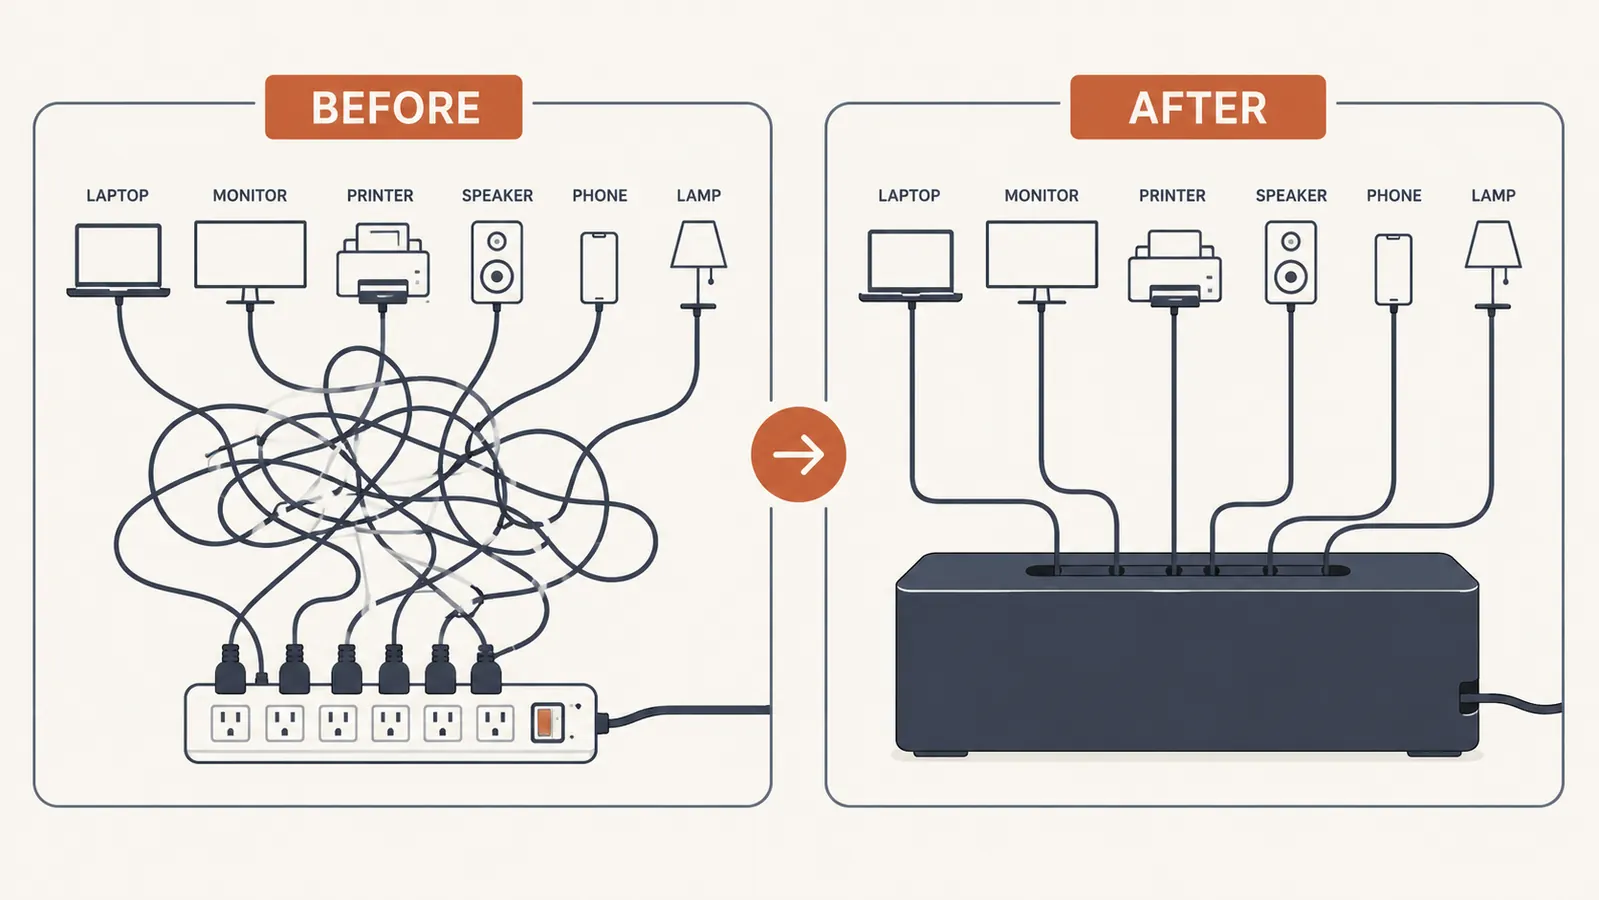
Most messy desk setups have cords plugged into two or three different outlets: one on the wall, one on a power strip, one on an extension cord looped around the desk leg. Consolidating everything into a single power strip is the biggest single change you can make. It means all your power delivery comes from one object, that object is the only thing you need to hide, and the only cord running to the wall is the strip's own power cable.
Use a surge-protected power strip with enough outlets for your actual device count plus two spare slots. If your current strip is already maxed out, this is a good time to swap it for one with USB ports built in, which eliminates your phone charger brick from the outlet count entirely. Once everything is plugged into one strip and powered on, confirm everything works before you move to step three.
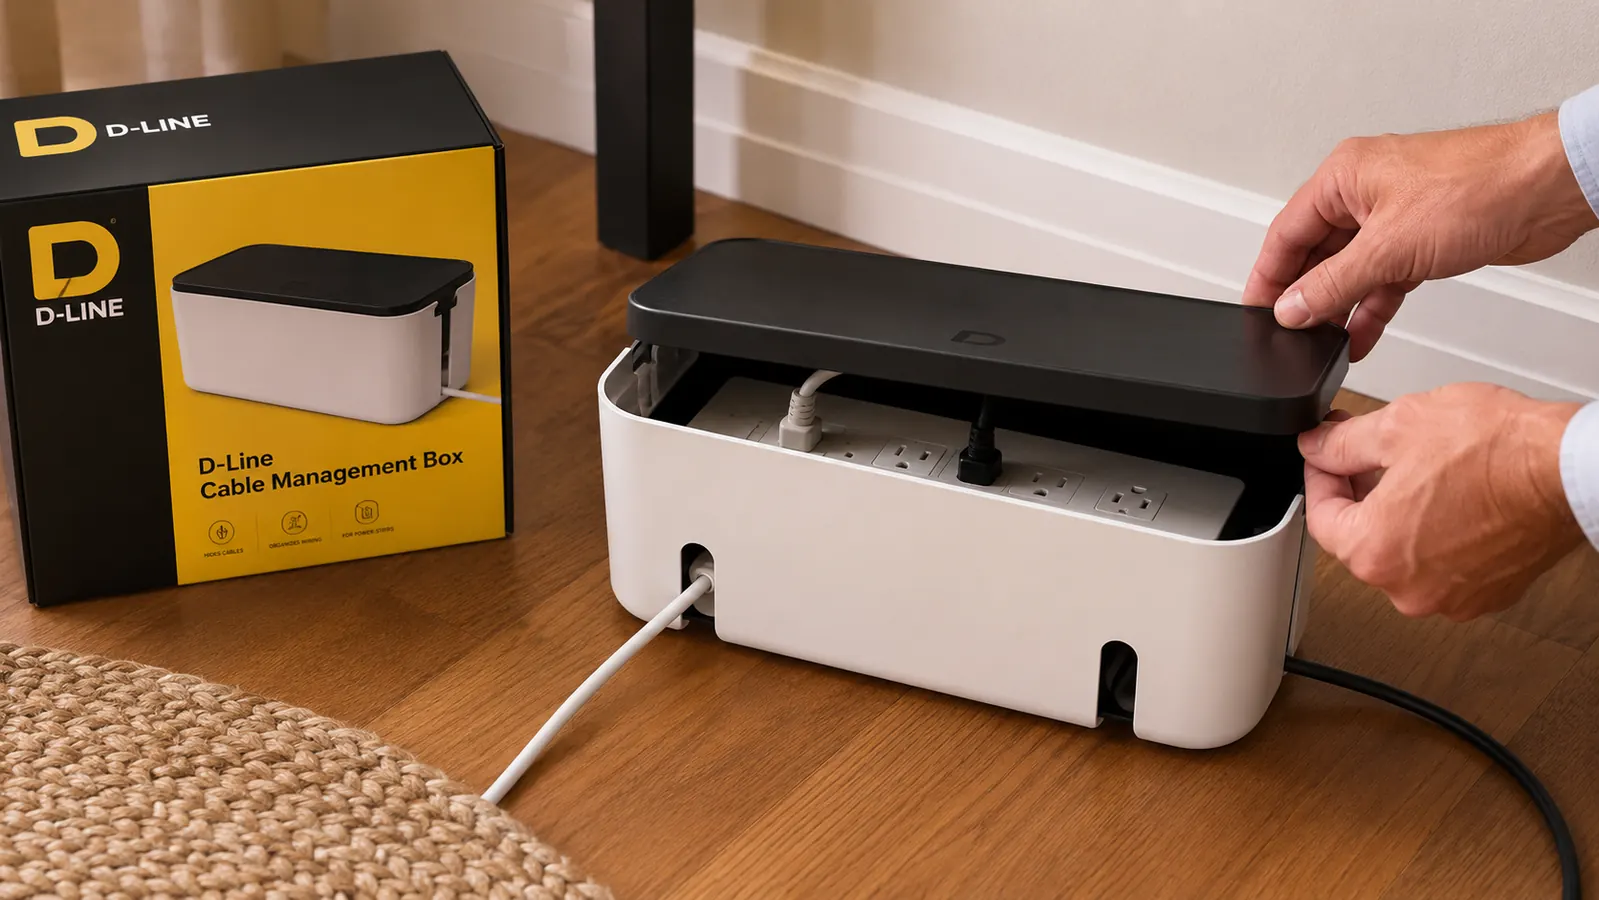
Step 3: Place the Power Strip Inside a Cable Management Box
This is where the D-Line Cable Management Box earns its place. Open the lid, lay your power strip flat inside the box, and route each device cord out through the slot openings on the sides. The D-Line box has openings on both ends so you can route cords from the left side of the desk out the left end and cords from the right side out the right end. The power strip's own cable exits the same way, runs to the wall outlet, and that is the only cord anyone sees.
Close the lid. That is it. The power strip is now completely enclosed. The box surface is clean, it does not get warm enough to cause heat issues during normal home-office use, and if someone glances under your desk on a video call they see a white or black rectangular box instead of a tangle of cords. D-Line ships two sizes, so measure your power strip's length before ordering. The standard size fits most six-outlet strips. The large size handles eight-outlet strips and compact surge protectors.
One note on placement: set the box on the floor directly below where most of your device cords hang down from the desk surface. This minimizes the cord length visible between the desk edge and the box. If you have an under-desk shelf or cable tray, the box can sit on top of that too, which keeps it even further off the floor.
The single power strip is the whole trick. Once everything feeds into one box, you go from twelve visible cords to one.
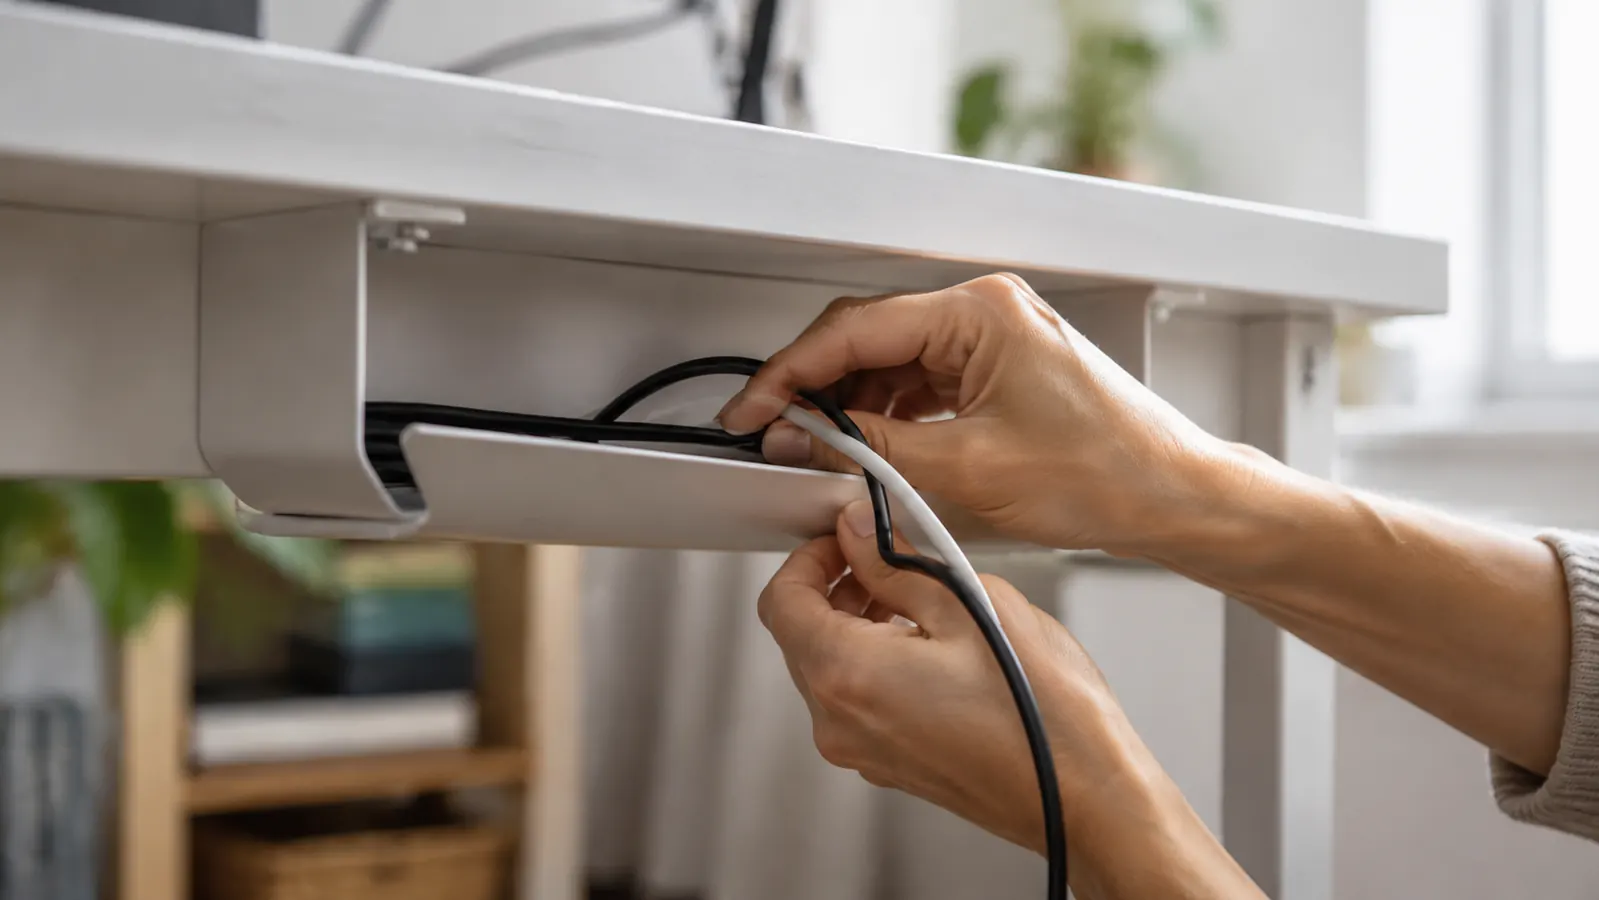
Step 4: Route and Clip the Cords Running from Desk to Box
Even with the power strip hidden, you may still have individual device cords running from the desk surface down to the box on the floor. These are the cords that create the visible tangle on the side of your desk. The fix is a simple adhesive cable clip rail mounted on the inside edge of your desk leg or the underside of your desk surface.
Peel the adhesive backing off a row of cable clips (they cost a few dollars for a pack of twenty on Amazon) and press them along the inside face of the nearest desk leg, spaced about six inches apart. Route each cord through a clip as it runs from the device down to the floor. The cords are now pinned against the desk leg and invisible from most viewing angles. If you are camera-shy about the side of your desk during video calls, this step alone changes how the setup looks on screen.
For the single cord running from the box to the wall outlet, use a flat adhesive cord cover to press it along the baseboard. These are the same plastic channels used to hide TV cables along walls. They come in white and brown to match most baseboards, they peel and stick without any tools, and most are paintable if you want to match your wall color exactly. A two-foot section handles the gap between desk and outlet in most room layouts.
Step 5: Address Any Cords Still on the Desk Surface
After the floor is clean, look at the desk surface itself. The most common remaining cords are the monitor cable from the back of the screen, the laptop charging cable, and a USB hub cable. These are shorter runs and harder to fully eliminate, but you can make them nearly invisible with two approaches.
First, use a cable clip on the back edge of your desk to keep each cord pressed against the back panel of the desk rather than draping over the top surface in view. Most desks have a back lip of one to three inches where cords can run out of sight from the front. Cable clips on that back rail cost almost nothing and keep the desk surface visually clear.
Second, for any cord that must cross the desk surface, use a flat cable spine, which is a fabric sleeve that bundles multiple thin cords into one flat strip. It will not eliminate the cord's visibility entirely, but it replaces a messy cluster of individual cables with a single low-profile strip that looks intentional rather than accidental. Run it along the back wall of your desk where it blends with the desk color.
When all five steps are complete, the typical home office goes from double-digit visible cords to a floor with one flat box and one cord running along the baseboard to the wall. The desk surface has, at most, a single thin cable spine along the back edge. That is a setup that looks clean on camera, takes thirty seconds to vacuum around, and does not accumulate the same dust-and-debris build-up that an open cord pile does.
What Else Helps
A cable management box handles the power strip, which is the biggest piece. But a few extras make the cleanup stick long-term. First, a short ethernet cable routed directly from your router to your desk via a wall-hugging cable channel eliminates the ethernet drop that typically gets caught up in the floor mess. Second, switching to a wireless keyboard and mouse removes two more cords from the desk entirely. Third, a monitor with built-in USB hub ports means your USB hub lives behind the screen instead of on the desk surface. None of these are required, but each one removes one more visible cord from the equation.
If you want to go further with the under-desk organization, a cable tray mounted to the underside of the desk surface can bundle the drop cords from desk to floor into a single organized channel rather than individual runs down the leg. I added one to my main desk setup in early 2025 and it shaved another four visible cords off the side view. See the full D-Line review for notes on how the box performs after five months of daily use, including how it handles a thicker 8-outlet power strip lid closure.
The point is not to achieve a zero-cord desk, because most real home offices cannot get there without a heavy investment in wireless everything. The point is to move from chaos to manageable. A cable management box, a pack of adhesive clips, and a twenty-minute session on the floor will get you eighty percent of the way there for under $30 total.
Ready to clean up the cord pile? Start with the D-Line box.
The D-Line Cable Management Box is the fastest single upgrade for cord chaos. It fits a standard power strip, routes cords out the sides, and closes cleanly. 13,890 reviews at 4.5 stars.
Amazon Check Today's Price on Amazon →